
Tadelakt is a term used very loosely in the construction industry, and often refers to some mixture of lime that is applied thinly and has black olive oil soap added to it to create what is known as the “Lotus Effect”. I have spoken even to manufacturers who claim they would make the plaster if they had a recipe, as many people ask for it, and others that claim all of their products are Tadelakt, and still some that claim any of their products can be used to make Tadelakt.
Obviously this seems conflicting and confusing. The inferred meaning behind Tadelakt is simplicity, thickness, raw materials, and a high level of craftsmanship using simple tools and no commercial sealants. Lime plastering in Morocco has been performed before acrylic admixes, before invisible penetrating sealants, and well before universal colorants and INOX Pavan trowels. Lime in Morocco has some natural clay impurities that when burnt create a lime that sets under water, and will begin to form a solid structure as soon as water is mixed. These impurities create what is known as an NHL lime, that stands for natural hydraulic lime, and does not have an added admix to help the lime set similar to concrete.

This lime in Morocco many claim to be more hydrophobic than another, or is able to repel water better; however, most companies have modified their Tadelakt plasters in so many ways it would be hard to say they thought the original to be the best in the first place. What makes Tadelakt so intriguing is its simplicity, and that its locally sourced and processed with a limited carbon footprint. Flying and shipping their lime to the Western world makes no sense as its entirely against the principles of what lime plaster represents; which is at its core ingenuity.
http://www.puretadelakt.com/
http://www.easytadelakt.com/en/
http://www.stuccoitalianoinc.com/our-materials/tadelakt/
https://www.mikewye.co.uk/product-category/tadelakt-polished-plasters/
http://www.tierrafino.com/tadelakt
Socli French Tadelakt
There are some other manufacturers also but these are some of the main ones you will find. If you closely look at the ingredients of the information or msds sheets, most of them all have added acrylics, rheological modifiers etc to ensure it is a lot more user friendly than pure lime mortar. If the lime is pure from Morocco, then they claim that the lime from this area of the world is special and is waterproof because of the area it is mined from. All of these contradictions just mean that we should ask the question what is Tadelakt at its core, and what really is being used in Morocco to create this amazing finish?
The Answer is lime, they use lime that is burnt crudely and has a large amount of lime that has been crushed but did not fully burn and will not break down into water, as its still calcium carbonate and not calcium oxide. The chemistry of tadelakt works like this.
CaCo3 + Heat = CaO
CaO + H2O = Ca(OH)2
Lime Base + Carbonic Acid = Pure Limestone + Water
Ca(OH)2 + H2CO3 = CaC03 + 2H20
Simply put adding air to the plaster mix means you have Tadelakt plaster on your wall. This plaster is not any different than lime mortar that has been used in Britain on so many of their exteriors; however they apply it and process it completely differently meaning it is not Tadelakt. Tadelakt is not a plaster, but a technique, a passion, and the perfection of creating something beautiful from a raw material with endless possibilities. If we don;t need to buy a special product to make Tadelakt then what is the process and how do we stay true to the original techniques?

There are two things that make Tadelakt unique: the first being that it utilizes slightly hydraulic lime NHL 2 equivalent, and triglycerides in soap to produce its overall effect. More unknown is that the lime itself in Morocco for Tadelakt is entirely unmodified, and used directly after burning. The lime more often than not will have varying levels of hydrualic characteristics and could be more or less strong and quick in its set. There is no standard mixture for Tadelakt, and different gradients of sifting mesh could be used to further correct the aggregate mixture in the product before use. If you were to do a basecoat you may want more of the larger intact lime granules, and if you were to do a final coat you may want less larger aggregates and more finer particles to aid in a more tight polish. The science of the soap is simple and as follows
Triglycerides plus Calcium Hydroxide = Glycerin + 3 Calcium Salt that are hydrophobic

This is a reaction that can happen with any lime, and in Britain they actually made limewash the old fashioned way by adding calcium oxide, which is highly exothermic when added to water, and would make their lime wash with lard on site. The heat from the reaction would melt the lard, and the water would make Calcium hydroxide, and the limewash would be called a “hot mix”. This is claimed to also allow the water to have the lotus effect, and beads right off the house. In Morocco however they found that the most effective means of creating a natural seal was by rubbing olive soap into the product during its curing period, effectively creating an entire top layer surface approximately 200 um deep of calcium salts that repel water.
This black olive soap is also a product native to the area, and is used widely due to their access obviously to olives. In the west we do not generally process soap so crudely and make the soap with olives that are still somewhat whole; however, this does not mean that once again without this type of soap our plaster will not be waterproof. In mexico there are many roofs built using lime just as they do in Morocco; yet, they are said to be sealing them with a dollar bar of soap they melt down in water. There are certainly different soaps that work better than others but the chemistry is the same throughout. I personally have found that Coconut soap works better than olive oil soap, and was given this advice by Alex Conrad who runs Vasari Plaster and Stucco here in California.
http://chicprovence.blogspot.ca/2009/08/tadelakt-hard-as-stone-and-soft-as-silk.html
I just read this article today and found the simplicity of her explanations very nice. From the pictures she is showing, its easy to see this coating is very thick and does not fall in the same category as Venetian plaster finishes. Its surface is thick, undulating, and full of perfect imperfections. If all these companies sell Tadelakt plaster, then what does it mean to install Tadelakt, and how can we benefit from their products?
If you buy someone’s Tadelakt plaster, it is generally either the real raw burnt lime, or has a lot of additives to make it easier to work with, either way when you mix it, the plaster will start to slowly set, and it will have to be used in a day or two. The secret to hydraulic lime is that if you simply pour water into the bucket and don’t mix the plaster up then the reaction does not take place as much between the burnt clays and the lime. Traditionally Tadelakt is always soaked in water for a day or two before use, to ensure it is properly hydrated prior to mixing. When you first pour out the plaster you will notice it has a lot of course grains in it, or at least it should. A lot of the plasters sold today under the Tadelakt banner have a very small marble or lime grain added, and does not produce the beautiful thickness and undulations of a traditional finish.
Because real Tadelakt is burnt lime that is left unprocessed, all of the granule sizes are rough in character and sometime has to be run through a sieve line to ensure the larger grains are removed. If the grains can fit through a 10 mesh then they are too large for your plaster finish. When a manufacturer uses local lime as they do then they have to add in the aggregates themselves. Most if not all the Tadelakt finishes of today are more closely related to the thin Venetian plaster finishes and would hold little or no resemblance to what is used in Morocco. The companies take powder hydrated lime, add in their own pozzolans, methyl cellulose for rheology, acrylic modifiers, usually the new vinyl versatates VeoVa, for strength, adhesion, and water durability, along with talcum powder for further increased ease of application and finally their aggregates of choice.
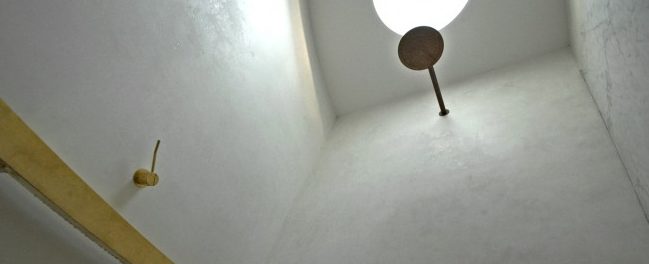
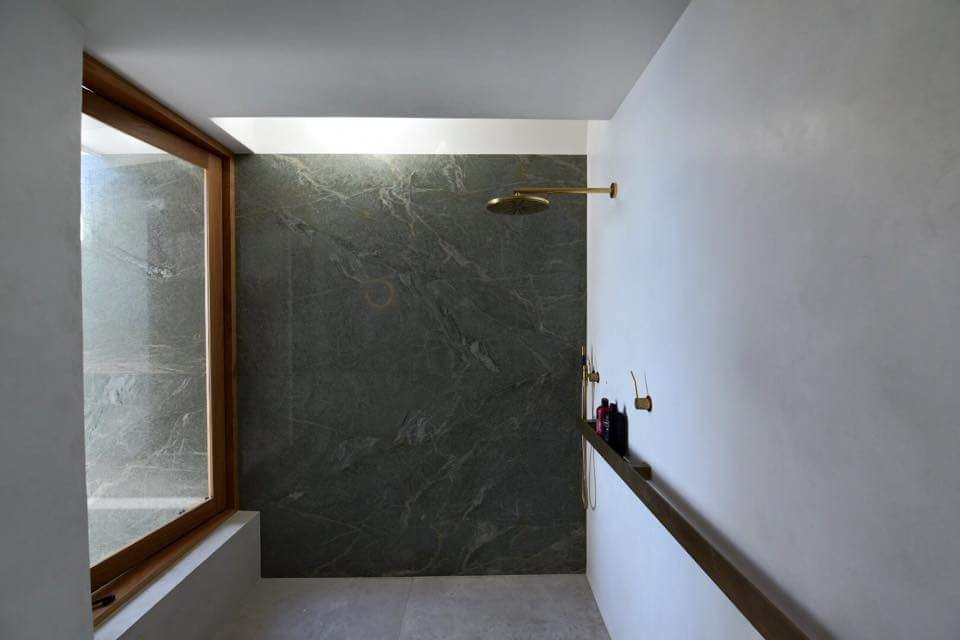
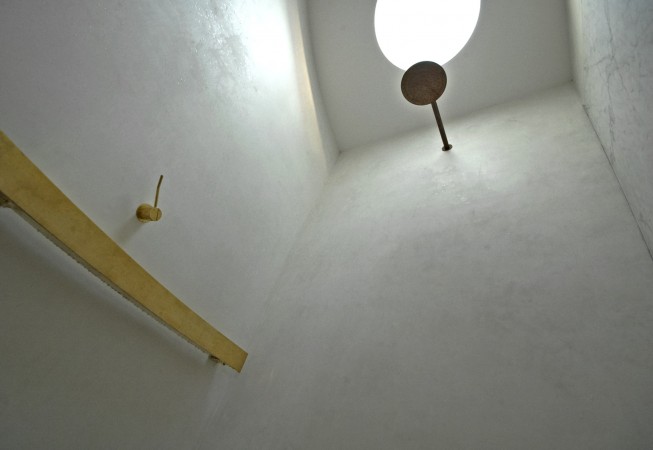
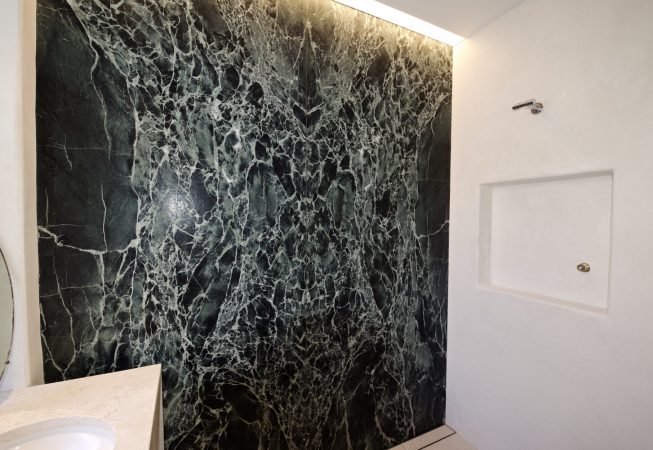
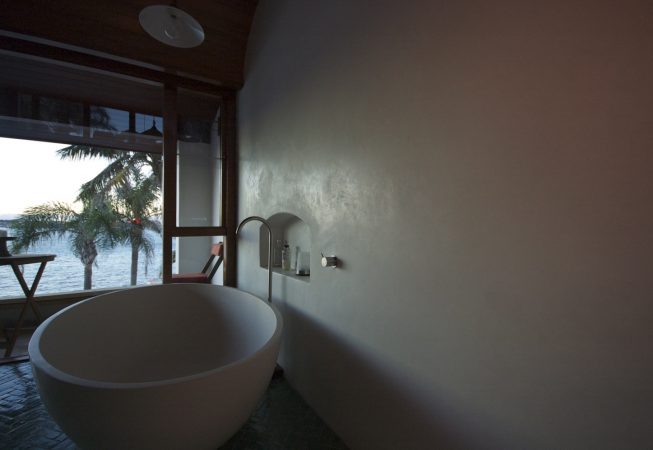
I see a lot of posts online from British companies claiming they apply true Tadelakt, and learned in Morocco and they show samples of their work versus other companies products, and most tadelakt samples are only a couple mm thick, versus their samples that are 12-15 mm thick on average. Tadelakt has always been applied thick, in many coats, and over a thick scratch coat of either cob, rammed earth, cement and sand etc. The trick with Tadelakt is having enough thickness to the material to be able to compress and maneuver the lime to produce a cohesive, shiny and random undulating pattern across large spaces. Without this thickness the product also will not withstand the stresses of constant water running over it, and most certainly would have problems being waterproof. Lets discuss then the steps to applying Tadelakt and how to achieve a wonderful finish using local materials.
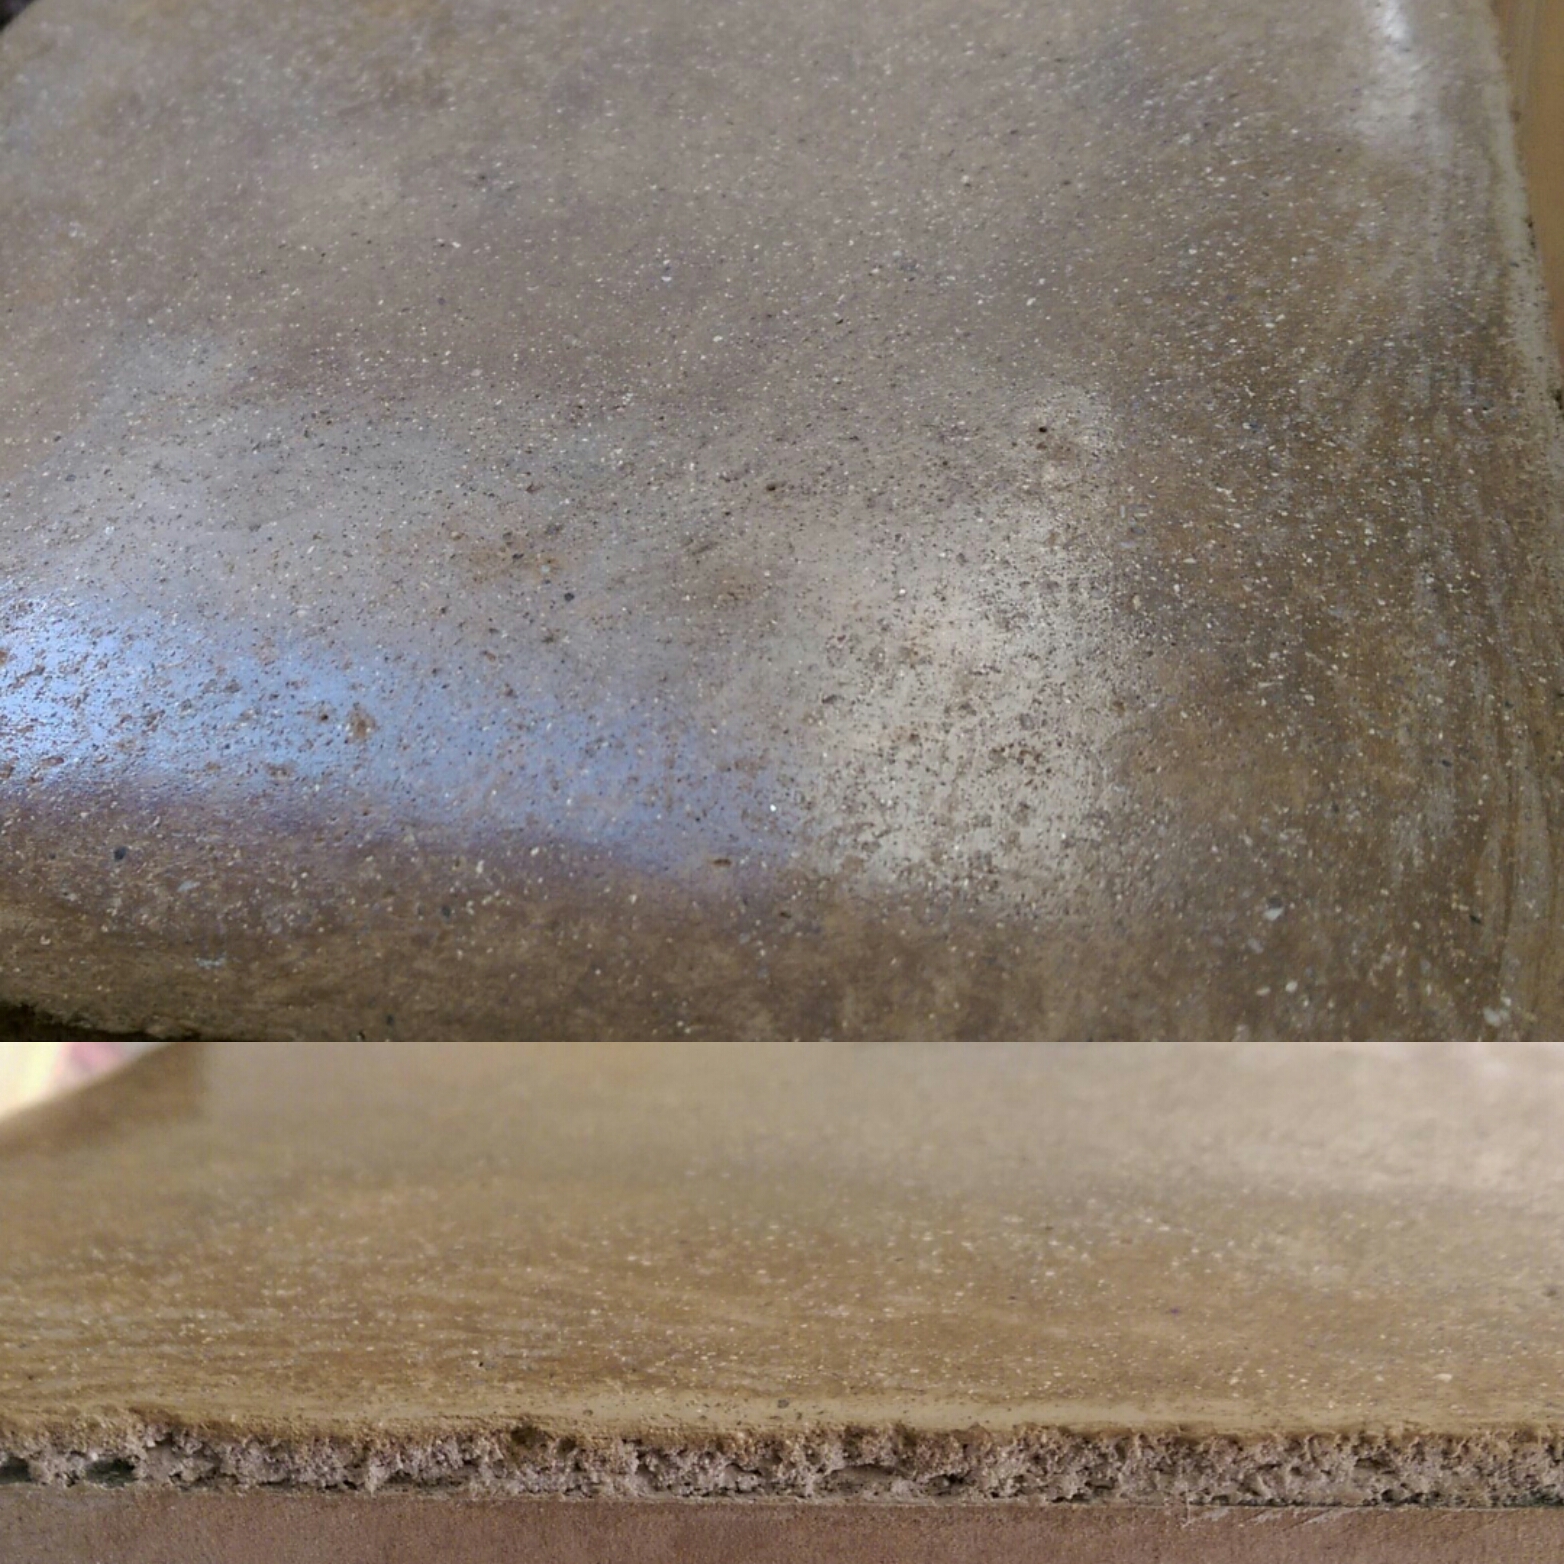
This is a sample showing the thickness of our Tadelakt here at 5 Star Finishes.
Tadelakt is made in two different ways if you want to make it locally and not adjust the formulas in any way from a completely natural finish. You can mix NHL2 bagged lime with 45% by volume of aggregate. The aggregate is found at any local building or garden shop and comes in the form of crushed agricultural lime, with a sieve line of 10-100 usually. This will provide you the natural crushed limestone that is similar to the un-burnt lime in Morocco. The second method is to mix pure calcium rich lime putty with the same amount of aggregate and use without it being hydraulic. The benefit of such a weak hydraulic set is not much, and either formula works well. Personally lime that is slaked and not hydraulic is always easier to work with, as NHL can be very dusty, sandy and hard to get to set correctly without losing their strength.
There is another method also that works really well, and this is to simply take whatever Tadelakt bag mix you have, and or an exterior stucco product such as Vasari Stucco, Or even a marmorino if need be and add in the aggregate yourself. It really doesnt matter too much what aggregate they have added, as you will be adding in a lot more than they have; however, keep in mind each plaster premixed will have its own unique final look and appearance depending on its admixtures and original aggregate they added. Please don’t be afraid to highly modify other manufacturer’s mixtures, as traditional lime mixes are 1 part lime to 4 parts of aggregate, and most Venetian or Tadelakt mixtures are only 1:1. This means that you can add in 3 more parts of aggregate as you have a lot of lime binder still available to you to work with. You will find it harder to get as much cream of the lime, or grasello, to come to the surface during polishing in these types of mixes however, due to the aggregate level being higher overall. I have successfully added well over another whole part of aggregate to Venetian plaster mixes for my own unique finishes for clients.
If you have a bathroom that is new construction, then you need to ensure that it is finished as you would for tiles, with the same wall sheeting, liquid membranes, or special membranes if your using a kerdi system or something similar. Whatever substrate you use behind the lime plaster needs to be waterproof, because we are not building with solid cement and stone in western countries, and believe it or not, Tadelakt is not watertight, and there is certainly a lot of water damage that could occur without the proper steps being taken. The corners and joints where the Tadelakt would meet tub liners etc would all be access points for water even if the Tadelakt was perfectly watertight, and any moisture overall would not be handled well in today’s construction industry. So finish off your walls with cement board, put a good couple coats of red guard or similar waterproofing membrane, and then apply a scratch coat exactly how you would for stucco or tiles, directly over the walls. If you have a water basin, tub etc, then these can be made out of brick and mortar, poured cement, or carved from hebel blocks commonly found in Australia.
If you have a basin you are covering in Tadelakt, then it is even more important to ensure it is water sealed with red guard, and then the scratch coats all applied over that. This is not obviously how it was or is done in Morocco, but there is no need to take risks with today’s technologies. Another option depending on the situation would be to use Xypex, as they have many products that will waterproof bare concrete and ensure it is watertight. This would leave a more natural stone finish for you to apply the base coat of plaster to. If you are applying to bare cement or any stone product without redgaurd, then it is always advised to use a concrete glue such as bondcrete etc to ensure a permanent bond to the cement substrate.
With concrete, or stone, or any surface if the suction is quite high and dissimilar in places, if its been treated with xypex, or has different sections like a kerdi board would, then you absolutely have to first create an even surface that will have the same properties in terms of suction and adhesion. The Tadelakt will dry very uneven if the walls have varying levels of suction, and could cause large problems with polishing, color variation, cracking etc. I would always recommend applying a good base coat or even two to the surface to ensure uniformity.
Because cement or lime base coats for stucco take a week to dry, these would not be recommended for a contractor who does not have a lot of time for drying. The best product that most Tadelakt installers recommend is a highly modified tile adhesive, these come in white or grey depending on the color you will be applying over top. You will want to leave the surface scratched or use a devils float to ensure the surface is rough enough for the Tadelakt. These products dry overnight, and are ready to receive your Tadelakt the following day or possibly two days after their installation.
Once the basecoat has fully cured, usually a day or two, you can determine how much Tadelakt you require for your project. If you have a company that has provided it to you, or you made it yourself, and your looking at their recommendations, they will not be correct due to your modifications. The typical spread rate is 5-7 Kg per m/2 per coat. This means that you require a very large amount of plaster compared to any thinner version of Tadelakt or Venetian Plaster. You can add your water and let it absorb enough so that there is a thin layer covering the top of the plaster, but do not mix it if your using a powder Tadelakt. Simply mix the aggregate and your NHL2 together, and let it soak for a 1-2 days before using. Then soak the earth pigments your using in some water and pour off the top layer of water in the buckets, and add the tint and mix. I would suggest getting a large container and mixing all the plaster for your bathroom or project at once, so that the color is not different between batches.
It is very common among custom mixes like these that your proportions and weights will be slightly different, and each bucket will look a different color. It is always a good idea with any plaster job to try and mix all the buckets together if possible. Now you can wet down the walls just enough so that the water is not running down the plaster, if this happens, then wait until the walls have absorbed the moisture. It is a good idea to soak them down a few times to ensure maximum adhesion of the lime, and also to ensure the wall doesn’t suck the moisture from the wall leaving you unable to spread the plaster at all. You do not want the plaster too thin or thick, it should hang from the side of your trowel but be wet enough to easily spread across the walls. You have no rehologic modifiers in this mix that help the lime to stay wet and retain its moisture so you may find it harder to apply than a modified version.
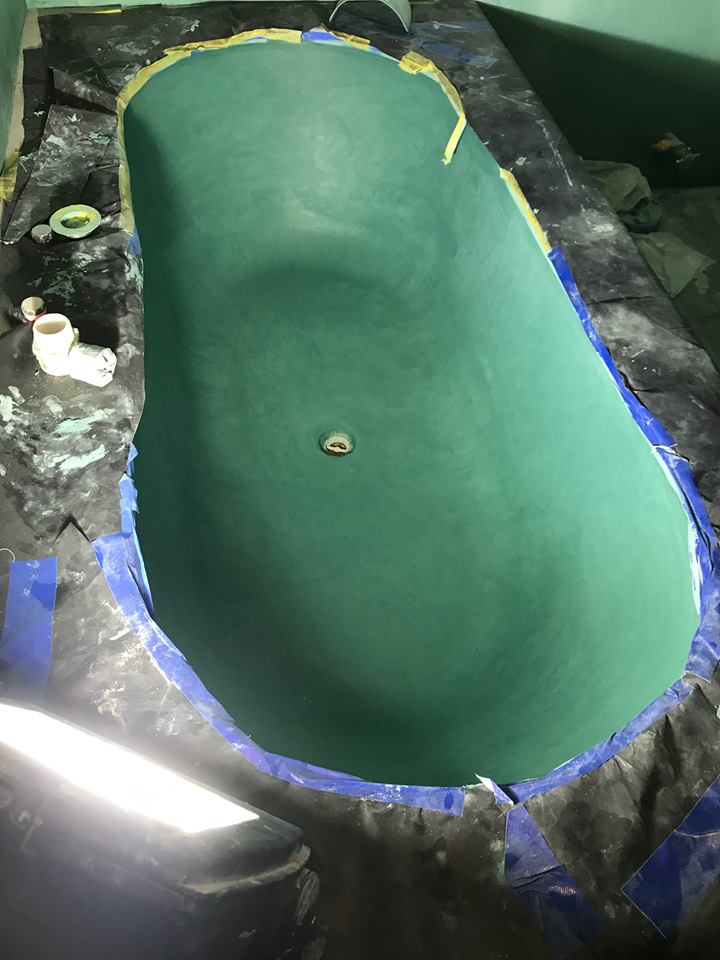
Once the plaster is applied do not work it up too much with a metal trowel, but simply compress it and work it into the wall with a wood float, this will ensure it grips to the wall, and that you dont get cracks. If you over trowel this plaster, the lime will all come to the surface leaving the aggregate at the base coat, and it will bubble and possibly fall of the wall. If you get bubbles stop troweling, and let it dry a little, the suction of the wall will draw the lime back to the base coat, and then finish compacting with a wood float in circular motions. This coat should be rough and open grained to ensure the next coats can be applied successfully. A lot of companies may even recommend one coat of this plaster, or maximum two, but personally I find building on layers is always the safest and most professional approach, so leaving this coat to entirely dry will give you the best results more often than not. You can do only one coat, or a wet on wet two coat system, but letting this coat dry is always the best option to ensure great adhesion and no chances of the Tadelakt delaminating. because this plaster has no Acrylic or natural binding modifiers, it is very easy for the plaster to break, crack or fall off the wall while applying it.
Wet down the base layer of the now dry Tadelakt, and apply your second coat, being careful to only apply it a little thicker than grain size, and do not over trowel it, just get it on and leave it until it sets up. Once the plaster is setting up and losing its shine from water on the surface, you can start wood floating the surface slowly, to try and level and smooth it a little, compacting the plaster into the lower layer. Once the wall has been floated leave it again until it is getting very firm and sets up. You can continue to float it if need be during this period just to ensure a strong bond and compaction of the aggregate with the lime, and minimise hair line cracking. Please note that if your walls are drying quickly, or are not smoothing as much as you would like, you can at this point apply another layer of Tadelakt “wet on wet”, that will help you to have an even more luxurious finish. This is a judgement call that most installers will make either just before installing the final layers, or possibly after applying the second coat and seeing how it is reacting with the base coat. You would obviously want to ensure you had enough mixed plaster for both coats ready and on hand.
Please also note that if you begin to trowel this finish with a metal or plastic trowel at any time before it is very well bonded to the substrate, it will bubble and possibly fall off in places. The lime has to set and bind to the bottom base coat of Tadelakt first, then the little amounts of free lime within the plaster left un-reacted is troweled and teased back up to the surface to create a closed pore system that will take a high polish, and be very water resistant.
Use a plastic trowel when the time comes to begin smoothing out the plaster. If you are only one person, it is advisable to only do maybe a wall or two a day, as it does take some time for the walls to set up, and you dont want to be in a situation where more walls are all drying at the same time, and you can’t smooth them with your plastic trowel. If this window of opportunity is lost, the plaster will be too dry and you wont be able to polish the Tadelakt. In this case the walls would need another coat of plaster or two to finish them properly. you need to work delicately but with pressure to coerce the lime up to the top layer, and spraying water on the surface may help in this process. You would want to mist it every so slightly just to help bring the lime to the top.

This is where there are differing opinions on the application, and honestly a lot of these variables all have to be determined and judged on site while your working with the product. One of the most prominent companies, tierrafino recommends only adding the soap water after 1-12 hrs of dry time at a 1:50 ratio, whereas Tadlekat, a book written by Michael Johanne Ochs states in Morocco they add the soap during the second smoothing with the plastic trowel and plastic bags at 1:20. I have done projects using Marmorino where we have used pure undiluted olive soap while it is drying to help in the polishing, and it has always worked very nicely. When it comes to Tadelakt, usually the substrate sucks a lot of moisture from the wall, and when the time is right, and the wall does not show any signs of instability, ie no finger marks when you drag them across the surface, then a 1:20 or 1:15 mix of soap to water can be brushed onto the surface. You will see it absorb immediately in and disappear. This also helps to add strength to the plaster as the water allows more carbonic acid to form, and further cure the lime. The slower it cures and with a lot of moisture present, the stronger the wall will become. The soap also acts as a plasticiser, due to the soap reacting with the lime to form glyercine and calcium salts. This glycerol enhances the open time by a lot, and if your doing a Venetian plaster project, you will find by adding pure liquid soap to the walls before they dry, you can work it into a very luminous surface that stays open for hours instead of minutes.
Instead of using olive oil soap as we discussed previously, you can purchase kiss my face bars of pure soap that are coconut or olive oil based. Either one will work well, but I do find that coconut oil works even better than olive oil. I recommend brushing the surface with the slurry of soap and water, and working it with the plastic trowel, and also with a plastic ball or wrapped up thin soft plastic that will not dig into the surface and make indents or cuts. This can continue for a couple hours until you have the entire surface smooth without any visible pores, closing in any areas with large grains of aggregate. The surface at this point should be shiny, and you could add soap a few times at least by this point to each area. By now you have already made quite a hydrophobic layer of lime and calcium salts on the surface, but it has not yet fully cured. You could start using the polishing stone at this point, or make the decision to polish it the next day. In either case, with some soap and water the surface will usually polish the next day but it could take longer and may not be as pure a shine. You can also cover the walls with plastic and mist them to keep them wet for the next day. The stone is very aggressive, and needs to be completely smooth, polished, and 7-10 on the mohs hardness scale. Usually Agates or Tiger-eye stones are used for this purpose. The stone needs to be professionally cut, and polished to ensure a flat usable surface.
The surface should not be rubbed with the stone if you think that the walls are not well bonded to the basecoat. The walls should also still have a very limited amount of free lime to bring to the surface. This is the time when you can easily break corners, or create bubbles that will crack later upon drying. The wall should be brushed with 1:10 soap mixture now, and the stone should be pressed firmly and rubbed around in circles over the surface only where the soap mixture has been applied and only while the surface is still slippery with the solution. If it dries out add more. When the stone is sticking, and you feel the surface change, you know the lime has come to the surface there, and it should be shiner, the pores should be tighter, and that area is considered finished for now. Continue this process until the entire area is done. As you go do not allow the soap to drip down the walls, and start at the bottom to ensure your sealing from the bottom up. Also have a plastic ball with you to polish and remove any extra soap solution after you have polished the area. The stone brings the lime to the surface and closes the pores, but the plastic bag can make that new wet lime immensely more shiny than the stone can if you rub it across the new area. You also do not want to leave any residue of soap on the surface, which is why rubbing any extra off is a great idea. You can also use a microfiber rag after the plastic is rubbed for further cleaning and polishing of the surface.
Once this is finished, allow the wall to dry fully, and then sponge the soap solution 1:10 over the entire surface area a few times in the morning and a few more in the evening, each time working with a microfiber rag to remove any excess as you apply it. If you see any areas that need more work, you can use the stone to further refine the surface still at this point. By adding more soap to the surface you will continue to create more and more calcium salts that will protect the surface from water. At least 7 coats of soap are recommended, and a 30 day cure period is best before water is used in tubs of water basins, but a week for walls etc should be fine. The Tadelakt is dry enough after a week to be waxed, but floors should not be used or sealed for 30 days. Tadelakt will not achieve a full cure for over 4 months so the longer it can cure the better. The wax will help it to naturally fight stains more than the soap treatment will. It is clearly stated by many manufacturers that Tadelakt can and will stain, and even is not entirely waterproof. In today’s building industry where everyone expects maintenance free work, a couple coats of wax will go a long way. The wax I would recommend is a pure white carnuba wax used for show cars. This is a very expensive option but beeswax does not hold up like carnuba, and a lot of waxes for venetian plaster are not even recommended for exterior use. Carnuba wax is in fact harder than concrete when it cures and has no problem with heat or water.
If you have a very high use area, or are renting on airbnb but want the look of tadelakt, then sealing it after at least a week of drying would be your best option. I would not add all the extra soap after the polishing, and then apply a water based penetrating invisible sealer, like GST Stain Block Elite. This will ensure the product performs its best and will deal with stains and stagnate water much better than the product sealed with soap.
Try making some samples for your clients and weigh up all the pros and cons of each mix, sealer system and where it will be used.
Im painter for 12 years and we star working with plasters my first job was a free bathroom and looks beautiful ,i know some mistakes but my customer was so happy and we start in 2 high fireplaces next week ,i pass to many month researching on internet about plaster recipes for tadelakt and other finishes and buddy you information is really good ,is great
https://www.houzz.com/projects/5576958
Thanks
Arturo Medina
Java Painting & Restoration
Hi Arturo, Thank you so much for reading our article. I am very happy it has helped you in applying your Tadelakt!!